Monthly Archives: July 2016


Fastback 29

I spoke to Bryan from Show Planes today. He was nice enough to walk me through the best way to do the layups for the bulkheads and stiffeners. I really must say he’s gone above and beyond in his support for this kit. He spent 30 min on the phone and was more than helpful. Combine the excellent service and advice with an extremely well made kit, and I really can’t say enough good things about Show Planes.

First step this evening was to remove the canopy skirt from the fuselage. I also removed all the tape.

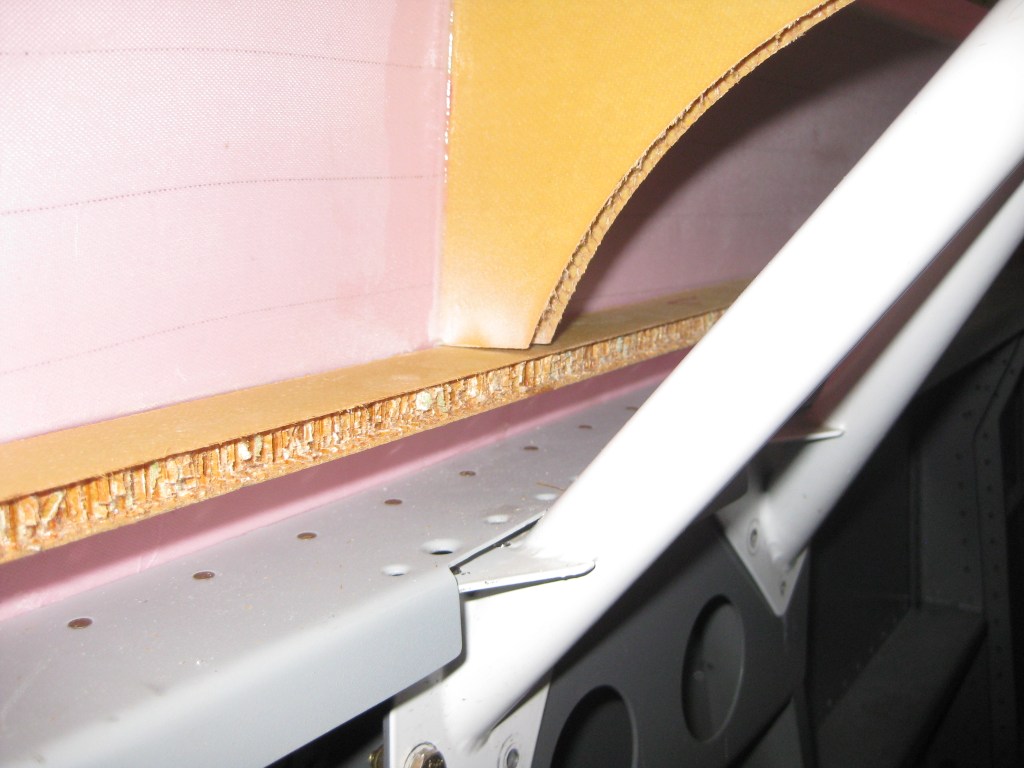
You can see from the first few photos that much of the flox leaked down below and made a mess. I anticipated this, particularly with the rail stiffeners, and everything was protected by tape and plastic.

IMG_4845 IMG_4846 IMG_4848

I used a dremel and a sanding block to knock down the built up flox on the underside of the canopy skirt. I then applied a filet of flox to the underside to fill in the missing patches that were either missed or flowed downwards from gravity. I’m very happy with the result. The only area not perfectly true is the front of the left rail which has a slight twist. This will be easy enough to incrementally fix as I apply the layups and eventual filler.

IMG_4852 IMG_4853

I mixed my first batch of micro balloons. This stuff is pretty cool. The balloons mix in an entirely different way from the flox. The smooth surfaces create a smooth paste. Consistency is much more silky than the flox, and I find it a little easier to mix the right amount. Although I let one application below be a little bit too viscous. Since the skirt was upside down, for the flox fillets underneath, I took the opportunity to being filling the edges with micro balloons.

IMG_4851

Based on Bryan’s advice, I kept the micro balloons fairly viscous, and therefore only filled in the areas that were horizontally positioned. In future sessions I can do the left, right, and top sides.

IMG_4857

I also put a very fine fillet of flox between the two center bulkheads. I will do the same on the other side before applying micro balloons.

IMG_4861

The results of the day can be seen here. Nice smooth surfaces on the underside of the rail stiffeners. I cleaned up the transitions to the forward and aft bulkheads.

IMG_4850 IMG_4862


Fastback 28

I began today by slowly shaping and fitting the lower canopy skirt reinforcement rails. These rails are positioned to affix to the bottom of the forward, center, and aft bulkheads 1 inch from the cockpit rails. They are a bit more challenging to hold in place than the bulkheads. In the first two photos you can see the forward and aft sections of the left reinforcement. This is prior to using any flox.

IMG_4838 IMG_4839

The edge at both the front and back of the rail on the outside required some sanding in order to match the curve of the fiberglass. All in all it was a pretty close fit.

IMG_4840

Once again I used my trusty tongue depressor sticks as a spacer.

IMG_4841

Lots of tape to prevent flox getting into places its not needed. This was particularly challenging on the side with the hinge. I COULD have taken the canopy off to affix these, but I prefer the frame to rest in its final position to ensure the end result is as true as possible.

IMG_4842

I used some tape and one clamp in the center to hold the rails in place.

IMG_4843 IMG_4844

As I said, this was more challenging that the other rails. Give careful consideration to how to clamp the rails in place and provide spacing from the other rails. I am almost certain that my flox bond will be less than perfect, particularly on the underside. I will likely need to do a second layer of flox with a syringe. Now I need to decide how to best do these layups.


Fastback 27

Before I did any more bonding, I took the opportunity to trim the canopy skirt for the canopy itself. To do this, you need to trim 7/8 above the joggle (point of canopy intersection). I marked a line all the way around the skirt. I found the best method to cut quickly is to use the pneumatic cutter for the first pass, followed by the dremel. When I cut the entire part at once, the cutters tend to walk or get bogged down. In fact, two passes turns out quicker and with straighter lines.

You can see the black line is where it will likely be completely cut. I decided to leave a little extra material here for the time being. It will keep the canopy more steady until I install all of the bulkheads, but more importantly, I’m not positive exactly how much I want to trim here.

After this I set about bonding the center bulkhead. I had to reinstall the roll bar. The bulkhead is 1 & 1/4″ aft of the roll bar, and 1 & 3/8″ off the rails. To keep the spacing, much as I did on the fore and aft bulkheads, I used popsicle sticks. They are about 1/16″ thick, and if you tape them tightly together you can account for any warping or deviation. I measured my little popsicle stick spacers and they were dead on. Best part, they are completely reusable. No need to cut up wood for this specific occasion. They are also light, so they stay where you put them easily enough. Getting clamps to stay where you like them to on the roll bar can be a challenge unless you have a circular shaped piece. With the popsicle sticks, you don’t even need that much.

I initially tried to clamp the bulkhead in place and then adjust. This was taking too long, so I made two more popsicle stick spacers for the bottom clearance. This made it easy to insert the bulkhead, check fit, remove, sand and repeat until I had the bulkhead exactly how I wanted it.

While the center bulkhead was curing, I pulled out the canopy. I didn’t do anything today, but I wanted to acquiant myself with the red cut line and the Show Planes instructions. Squire was pretty excited to see the canopy out of the box!

Before I left, I also set the top bulkhead in place.

Note that the top bulkhead doesn’t not abut the center bulkhead to form an intersection. You will need to create the intersection with flox / fiber.

Here’s a better picture showing you the upper intersection.