I began today by riveting the newly fabricated F-884 attachment plate to the front spar of the vertical stabilizer. Before doing so, I shot the bottom of the spar with some primer to account for the cut that had been made a few blemishes in the AKZO.

Next, I reinstalled the stabilizers. It turns out I should have left the vertical stabilizer off. 
Time to begin attaching the elevators.

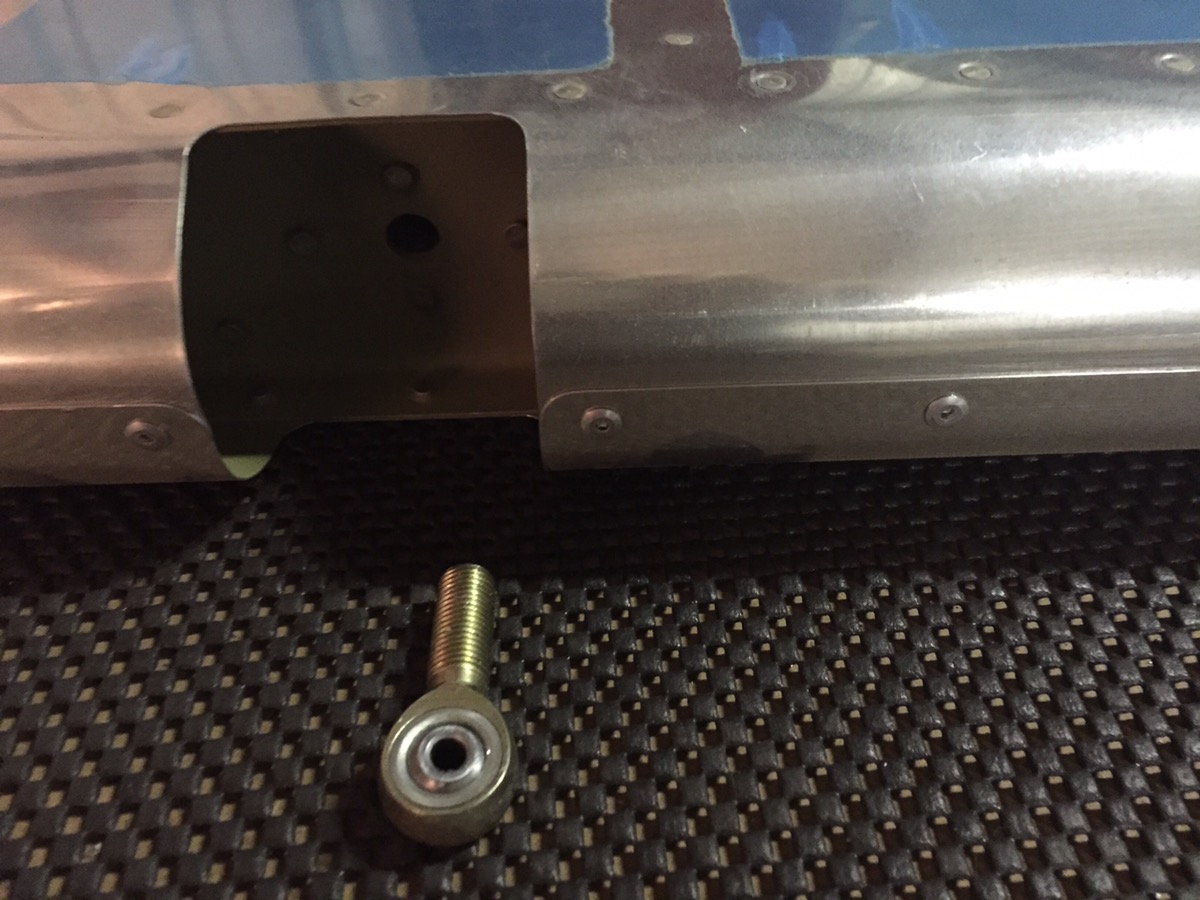
As soon as I attached the elevators, I realized I would need to properly install the rod end bearings, to ensure they were the appropriate distance prior to drilling the elevator horn, and trimming the horizontal stab skin for the counterweight arm.
Torquing the jam nut required an offset. You can find a great torque wrench adaptor calculator here.


I trimmed the skin of the horizontal stab for the counterweight arm on the left side. After doing so, I decided I’d do the other side when I remove the horizontal stabilizer. I still need to remove a portion of the flange on the rear spar to allow full travel of the elevator. But I can do that last, and I can trim the right side at the same time.
Here are a few good photos of the trim result after cleaning it up. I’ll likely need more clearance when I glass the counterweight in, but I can trim more when the time comes and I know exactly how much clearance is required. 
My buddy Mike dropped off these bad boys. They are a godsend for temporary installation of the control surfaces. I had to shorten them slightly to make them work, but once I did, they made easy work of mounting the elevators. I’m not sure where he got them, but get yourself a set!

Next, I had to drill the upper pivot point of the elevator horns. To do this, you need to mount the elevators, and then lock them in position so they are true to the chord line. I used a clamp and a few blocks of wood on the counterweight arm to set the elevator in the appropriate position.

Next, you’ll need to make a bushing so the drill bit doesn’t hit the actual bushing. I used some spare aluminum tubing from the fuel tank vent lines. I had to use the soft scotch-brite wheel to reduce the diameter ever so slightly for a flawless fit. 
I initially drilled to a #30, and then slowly worked my way up to a 1/4 bit.

You can place a maximum of three (not including the steel washer) in between the horn and the hinge point. Unfortunately, at this point I have a small problem. There is not enough clearance between the head of the bolt (or nut) to attach a wrench. I can get a socket on the one side, but there isn’t enough room for the socket wrench, so I’ll have to do some thinking on this. 
I also took a selfie. Because. Instagram.

I made a quick reference guide pulling together a few torque tables from various locations. You can view it here: Torque
Session time: 6.0 hours