Much as I did with the oil cooler bypass valve, I wanted to get a head start on replacing the nose seal tonight by removing the spinner, prop, and flywheel. Then when the new nose seal arrives I can be ready to go.
First I removed the spinner and the propellor. Then I loosened the alternator belt and removed the flywheel.
This is where it gets interesting.
I wanted to inspect things carefully – as I wasn’t 100% convinced the source of the oil was the nose seal.
So the first thing I noticed, was the face of the engine behind the flange was dry. If the oil was coming from the nose seal… this is pretty unlikely. The pencil is pointing to the dry location.

This area (indicated by the pencil) is also dry.

Now the flange itself has a good bit of oil on it, including some fine blackened oil particles. You can see the oil spray in the next 3 photos. Now, the oil all over the rest of the engine has not been black, but clean mineral oil. I suspect this is just what is left behind after running a full speed.


At this point, I’m fully suspicious that the culprit is the o-ring to flange seal, instead of the crankshaft nose seal. Inspecting the flange shows some very minor scoring where the o-ring would sit. Shown in the next photo.

Here is a close up. The scoring looks worse in this photo than it is. With your fingernail this is barely noticeable. But still its there.

Just a little bit of scotchbrite action resulted in the following photos.

You can also see evidence of the oil show in black here on the inside of the flywheel.


Now I decided to do one more test to confirm that the nose seal is in fact not leaking. I took a clean papertowl and ran it down along between the crankcase trigger wheel and the nose seal. Directly making contact with the crankshaft and the nose seal. I did this all the way around the crankshaft.


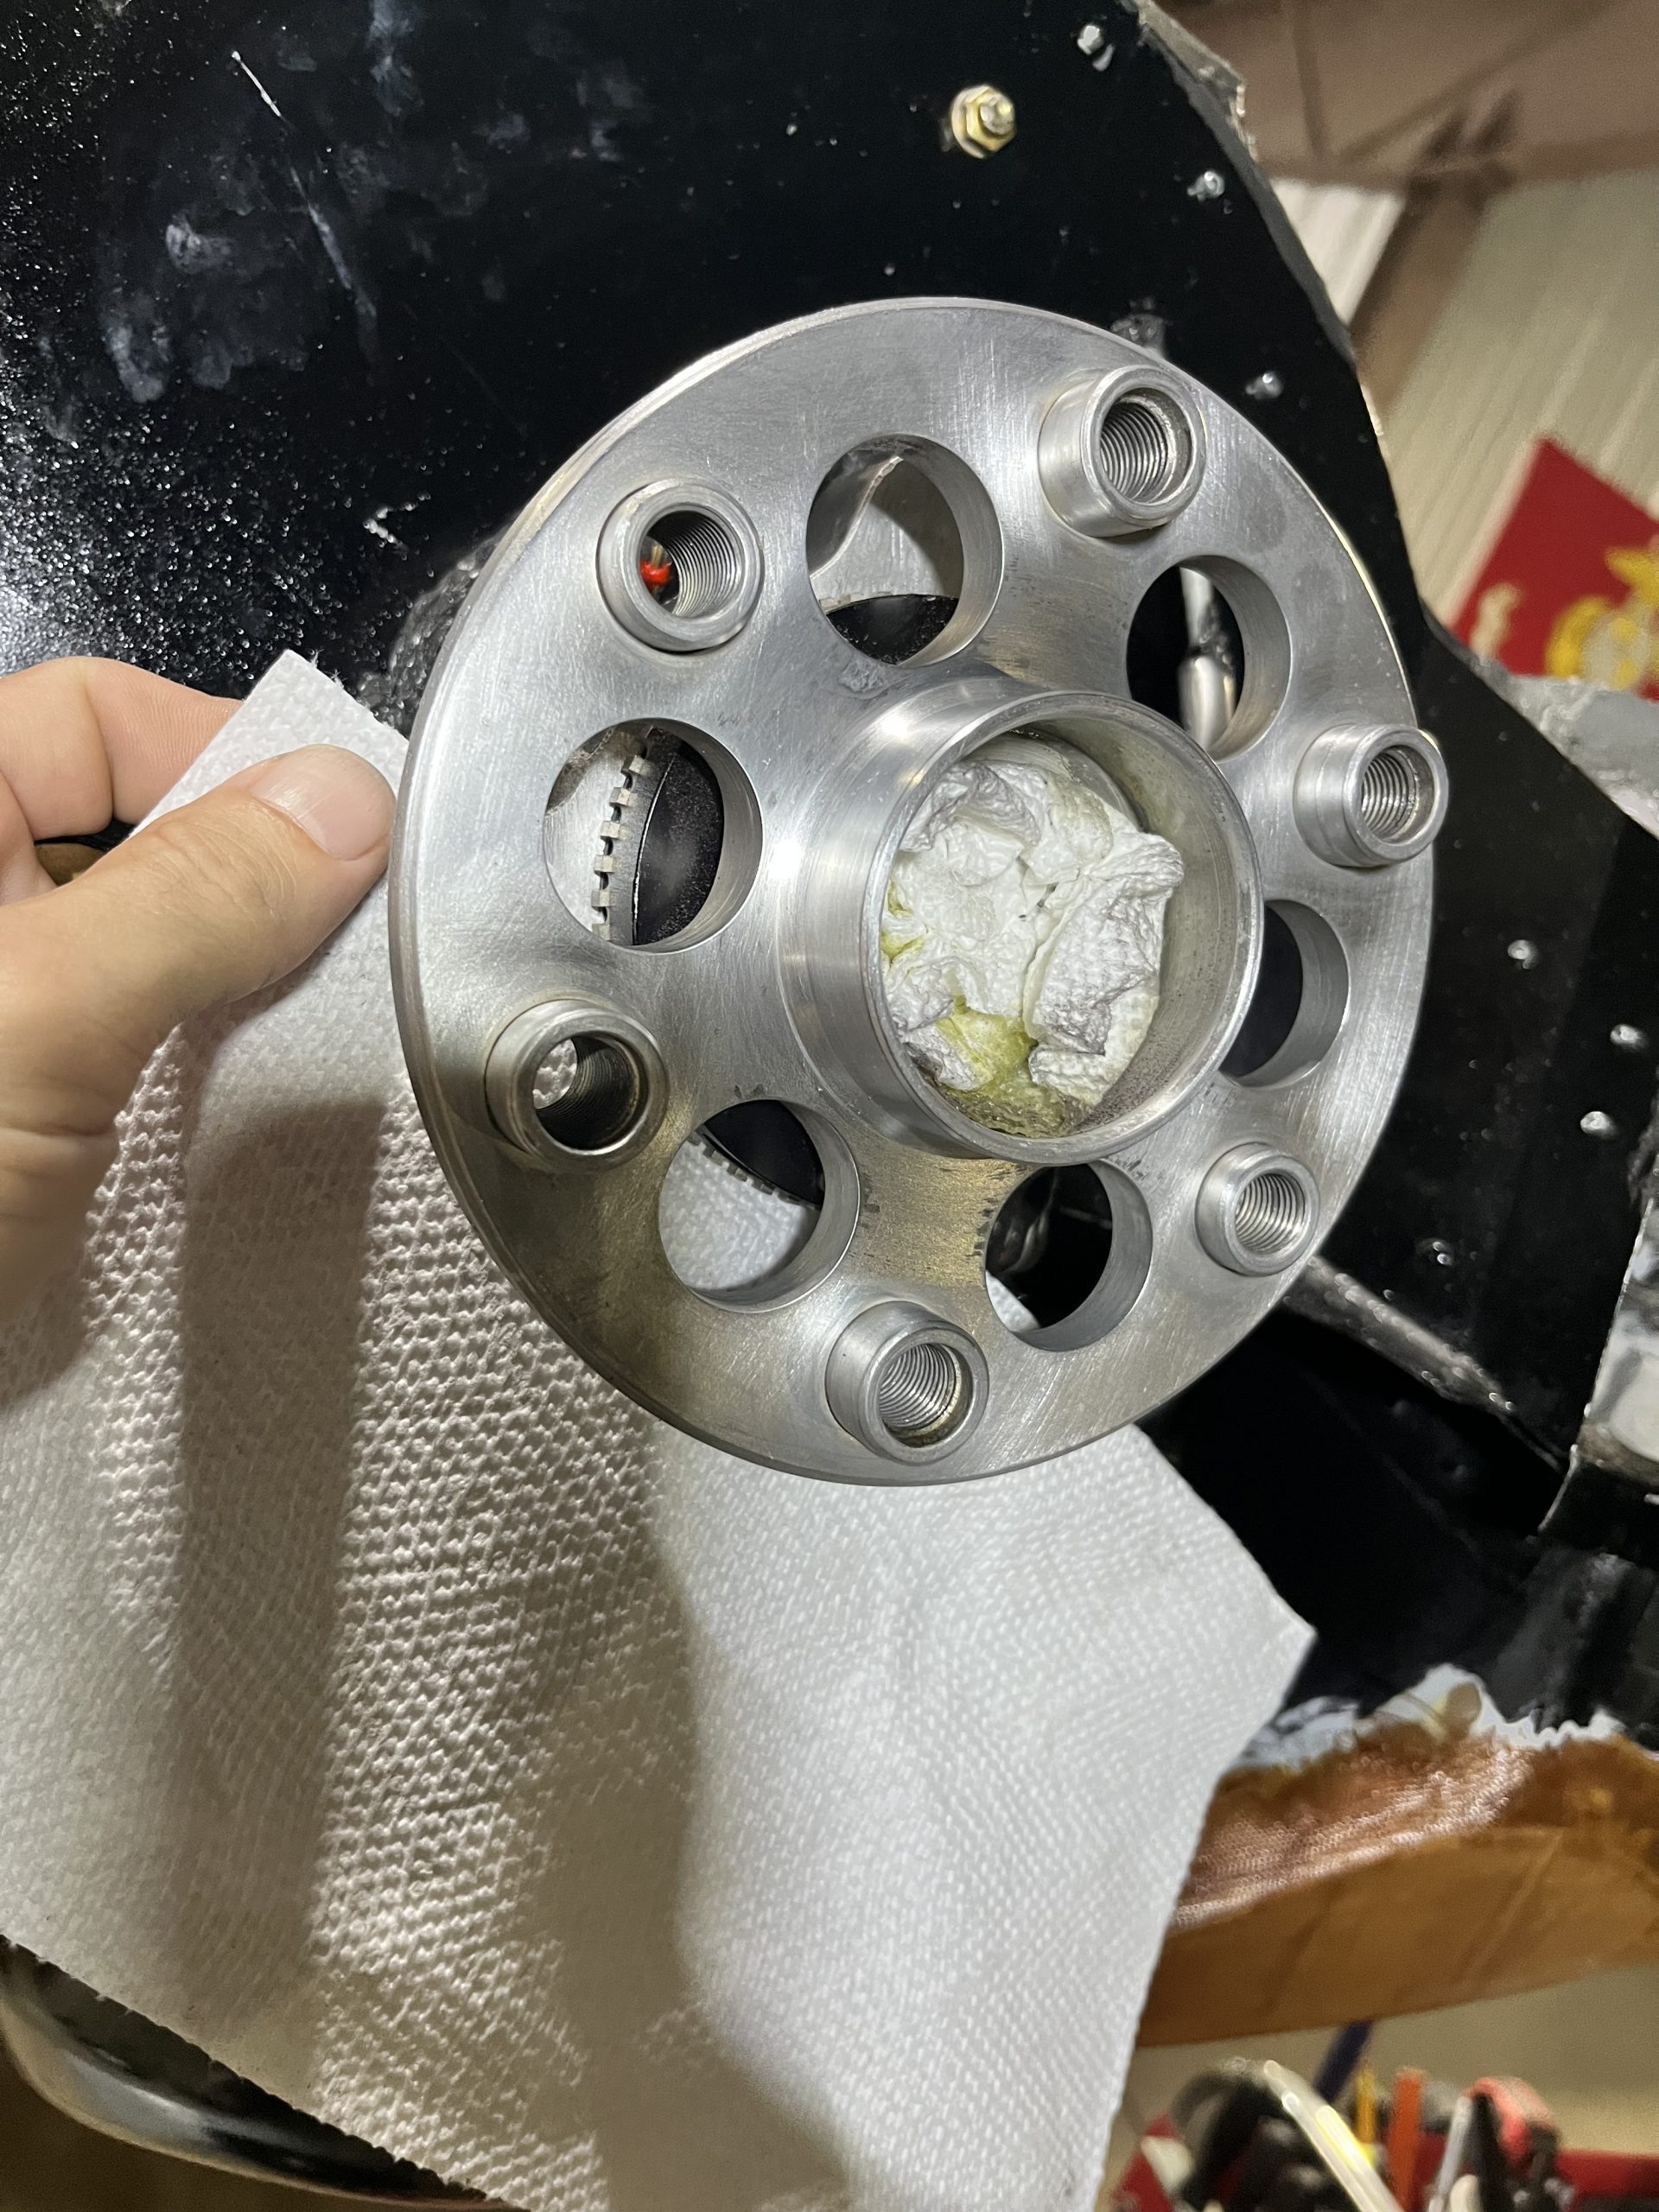
The result was a completely clean and dry paper towel. I cannot imagine that the papertowl would be clean if the nose seal was the leaking problem. In which case, maybe it never needed to be replaced to begin with.
This means that my likely culprit is the hub to crankshaft flange intersection. I set about doing a thorough inspection of both the hub, the o-ring, and the flange. The o-ring and hub both looked immaculate. The flange had some grime, and the minor scoring shown earlier. I used some scrotbrite and some solvents to thoroughly clean the flange and the mating surfaces. I’m also going to get a new o-ring while I’m at it. Fingers crossed!