The Show Planes Fastback includes new cockpit rails that are slightly smaller and attach in a different manner from the standard rails. With a quick build this means that I need to remove the currently installed rails. First I removed the bolts holding the center bar in place. 
Then I began drilling out each of the rivets carefully using my rivet removal tool. I used a #40 (or #30) punch to break the head off each rivet and then a spring loaded center punch to pop the remainder of the rivet out of the longeron. Its preferable to not drill through the longeron… this is a structure you don’t want mistakes in.

Sometimes pop rivets can be a pain in the rear to remove. I find that if you drill completely through with a slightly smaller drill and then pop the heads of in the same manner, its easy to punch the remainder through. I use a number 38 drill. 
Here is the fuselage with both rails removed.

Next you need to trim the two F-804c bulkheads down to accommodate the thinner rails. The cut line is marked in red. This is going to result in a few areas close to existing holes. There is a center cap that goes over this area, so I’ll have to modify that, and test alignment to see how to best deal with any edge distance problems after the trim. In the Show Planes manual, the bulkheads do not show any holes, so I’m assuming this was added to the updated -1 fuselage. 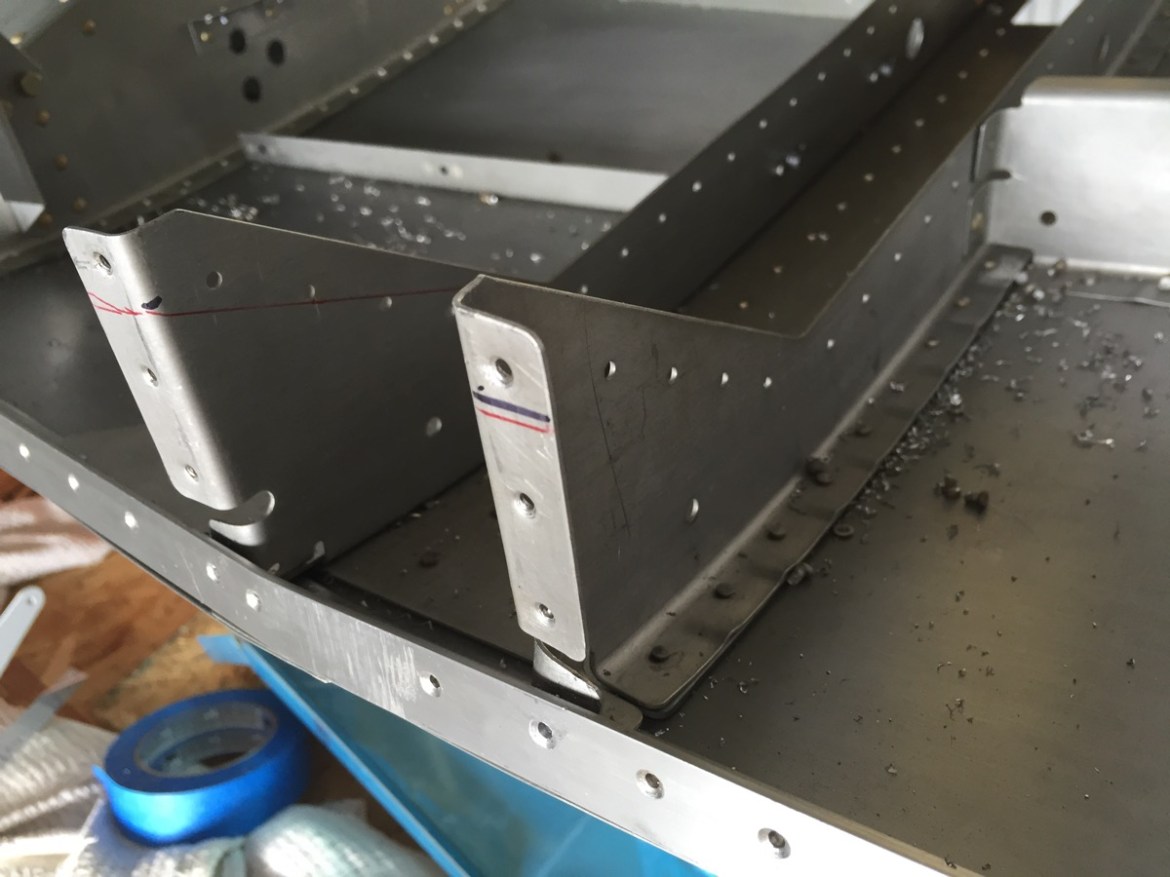

Here you can see the photo without any holes in the Show Planes instructions. Also, there appears to be an additional part on top, that is not present in my kit. 
Here is the cap that will need to be modified to fit the newly trimmed area.

After the cut. 
Unlike the stock rails, the new rails fit between the longeron and the outer skin at the front. A few cleco clamps and attention to detail are required before you start this drilling. The photo is supposed to say longeron not lingering. Autocorrect!

39.3706208-76.9664173


