Monthly Archives: September 2019


Empennage Fairing 3

My Doug Bell tailwheel fork arrived today – I got the black painted version from FlyboyAccessories. I wanted to link it all up to see how everything fit. I then set it aside. The tailwheel is all but install – only a few bolts to torque and attach the rudder cables and she’ll be good to go.

IMG_2472

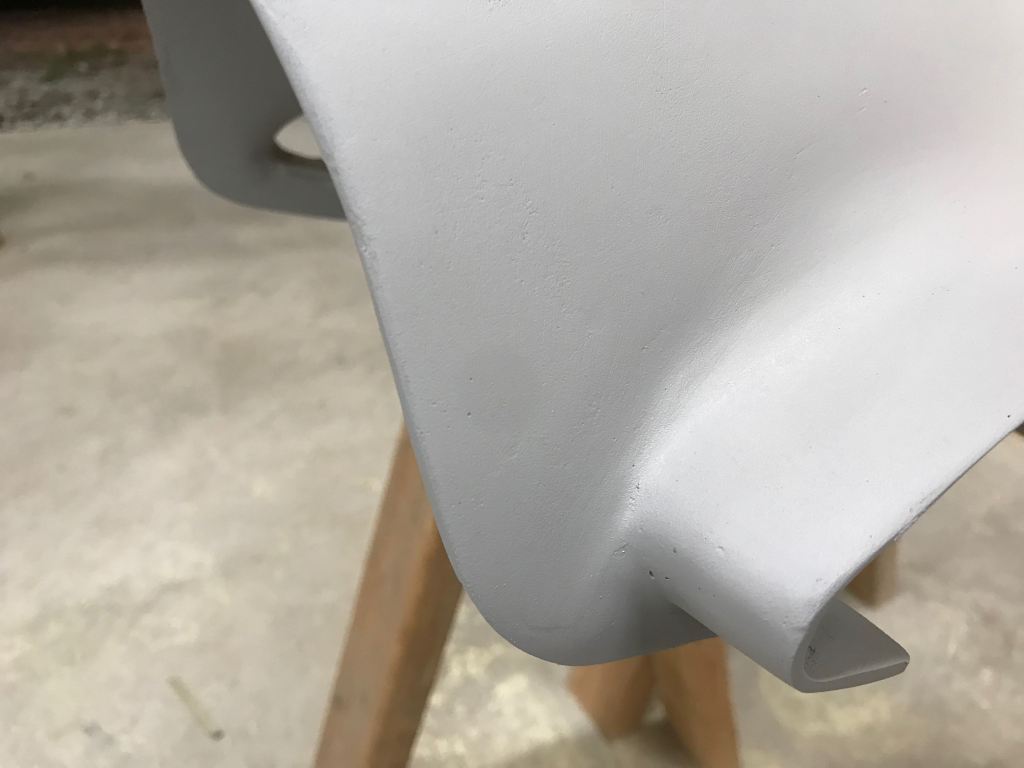
Next, I gave the empennage fairing a little love. I checked fit versus the aluminum fairing that is installed underneath the horizontal empennage. And then I cleaned it up and gave it another good spray of filler primer.

IMG_2474

While that was drying up I worked on the lower aluminum fairing and rear cover plate. Van’s instructions call for tapping the longerons to accept screws and then machine countersinking the skins. I’ve read that some people just rivet this part on, as there’s never really any reason for it to come off. I have to say, I’m not highly impressed with this part or Van’s method for attaching it, but I don’t see any reason to rivet it either. When in doubt, I’ll stick with the Van’s method.

First step was to match drill the fairing, and then debur and dimple. Next step was to drill everything to a #36 – then machine countersink the skins and longerons.

IMG_2476

I’m pretty happy with the results.


Canopy Work and New Toys

Not a ton to report in this post. I started reviewing my work on the canopy to figure out exactly what remained. I had not attached the hinge cover that blocks air so I attached that. I removed tape and prepared the final portions of the canopy. I didn’t document this with photos well.

IMG_1973

IMG_1971

I also did some work on the instrument panel cover.

My current approach to work is to finish remaining work on the tail and the wings so that I can concentrate on the firewall forward etc. To that end, I made a number of purchases this week.

First, I bought the Garmin heated pitot tube (unregulated.)

IMG_2454

Next, I bought the ACK ELT.

IMG_2456

I also bought almost all of my lighting requirements from Flyleds.com. This included the 9000 lumen Seven Stars landing light (here’s the heat sink). The wingtip nav and strobe lights. (not shown)

IMG_2457

The tail strobe.

IMG_2459

I also bought the JD Air tailwheel arm, and still in the mail is a Doug Bell tailwheel fork. Also not pictured is the Archer wingtip VOR antenna. I only bought one landing light, as I wanted to see the build quality, and test the light against the Baja designs lights before committing to two. These purchases get me a lot closer to having most of the components required to complete the tail and wings.

IMG_2460


Empennage Fairing 2

Next up in the empennage fairing is basically cleaning everything up and making it a smooth surface. I use Rage Gold body filler for final prep. Obviously the outside needs to be smooth, but I also want the inside to be relatively smooth so that it doesn’t scratch things too badly when taking it off yearly for inspection.Using two saw horses a great way to position the fairing for work.
IMG_2152IMG_2155

After filling everything to my satisfaction it was time for a layer of filler primer. This serves two purposes – first its going to need to be primed anyways and fill pinholes, but secondly it also serves to make flaws more obvious. Areas that aren’t smooth enough, are poorly rounded, or aren’t flat will show up much easier under a layer of primer than before.

And there were definitely imperfections, however, not nearly as many or as bad as I though. In fact I was quite tickled with myself how well it has come out so far!

IMG_2185

Here’s a good view of one area with some imperfections. The intersection of the new overlap is a bit rough.

IMG_2187

IMG_2186

IMG_2189

IMG_2188

After this I pulled the empennage back apart so that I could install the nut plates at the points I plan to attach the fairing.

IMG_2229

There are some other things I need to figure out here – such as the back access plate.

IMG_2231

And the aluminum horizontal stab fairing.

IMG_2232

I countersunk the fiberglass for torx screws. I was super happy with the countersinks, or the strength of small screws through relatively thin fiberglass. I decided to go with the Tinnerman washers (ACS calls them countersunk washers). I actually think they look better with the tinnerman washers installed.

IMG_2451

I will have a total of 4 screws on each side. Two on the horizontal empennage upper surface, and then two more back behind the elevator horn. I call that success in my book!

IMG_2452