Tools


Back Riveting Setup

Many builders spend a lot of time and energy in building the perfect shop, workbench, or the like. I guess it goes with the territory. People who are crazy enough to build planes, like to be elaborate. While I love my shop, and I strive to keep the organization near perfect, I’m not always about building the ultimate item. We have a farm, and farms always have lots of scrap material. If I can find a perfectly workable solution using scrap, there is no way I’m making a trip to Home Depot and spending money to make the perfect back rivet table.

I found this particle board laying around. Its not perfect, it could scratch aluminum pretty easily, but its free and is the correct width. I was also lucky enough to find an old can of urethane.

My idea is simple. I’m going to create another table top that I can lay on top of my existing workbenches with the particle board shown. I will make it in two pieces with the plate cut out and in the middle.

I forgot to take pictures, so I’ll post them the next time I go out. But I got the wood cut, sanded the surface and applied a polyurethane to the surface. If the surface is still too rough, which I doubt, I’ll either re-sand and reapply the polyurethane, or I will lay some extra rosin paper I have laying around over top of it. I intend to anchor this to the work bench with 4 predrilled screw points, so that I can easily attach and un-attach as needed for back riveting. It might not be pretty, but its functional and with a $0 investment and only an hour of time, its the perfect solution in my book. 20130414-215240.jpg

20130416-200647.jpg


Horizontal Stab 20 (6.5 hrs)

Previously, I’d completed riveting the rear spar and front spar assembly.  After three weeks without touching the kit, I came into the weekend with one goal: finish the horizontal stabilizer.  I completed all of the internal riveting on the left stab, and got a really good start on the right stab.  Tomorrow I will just have to finish the right stab’s internal riveting, and then rivet the remaining items.  The final items will be quick and easy as all of the rivets are on the edge and can be squeezed by hand.

Before I forget, here are a few quick thoughts on tools.  Tungsten bucking bars are awesome.  They are expensive, but absolutely worth it, I cannot recommend them highly enough.  Additionally, the hand squeezers with cams in them (Avery and Cleveland Tools sell these) are another absolute must have.  Digital calipers, and clear plastic rulers are a few other great items that I’m glad I got. Lots of small containers for rivets and clecos are a big help.  The previous owner of my kit bought portable storage containers with separate compartments for each rivet.  He even labeled each container, and this has been a huge time saver.  I can just grab each individual container and take it to where I’m working.  Lastly, Jack’s bag of lead shot has been more useful that I could have imagined.  It takes the place of clamps constantly.  With the lead shot, making things stable for riveting is as easy as throwing the bag on it.  So what tools suck?  Well, I haven’t used my pneumatic squeezer yet.  Not that its a bad tool, but honestly I find it much easier to make a mistake with a power tool than a hand tool.  With the great hand squeezer I have, even big rivets don’t require much muscle, and its really hard to make a major error.  Pneumatic cleco tools are also, IMHO a waste.  Unless you have bad hands, the cleco pliers are just as quick.  If you’re working on the kit enough, your forearm will be in “cleco-shape.” If your hands get tired or sore from cleco pliers, thats a sure sign you need to spend more time working on the kit. 🙂

So here are photos from today and a quick step through. Riveting the 707 to the front of the skin.  This step is a bit of a pain in the ass.  Getting the first and last rivets to remain flush is challenging.  I used some weight to hold the skin at an angle that allowed everything to line up.

20130406-212133.jpg

20130406-212153.jpg

Here you can see my weight (clecos) technique.

20130406-212208.jpg

I wasn’t exactly sure how the riveting was going to go as I’m still a beginner, so I riveted every hole when attaching the front spar assembly to the skin.  After cleco-ing both sides, I found this little gem!  Somehow a hole escaped my eagle eye during dimpling.  I was able to un-cleco a section and use one of Jack Savage’s tools to get the dimple done without taking it all apart.

20130406-212227.jpg

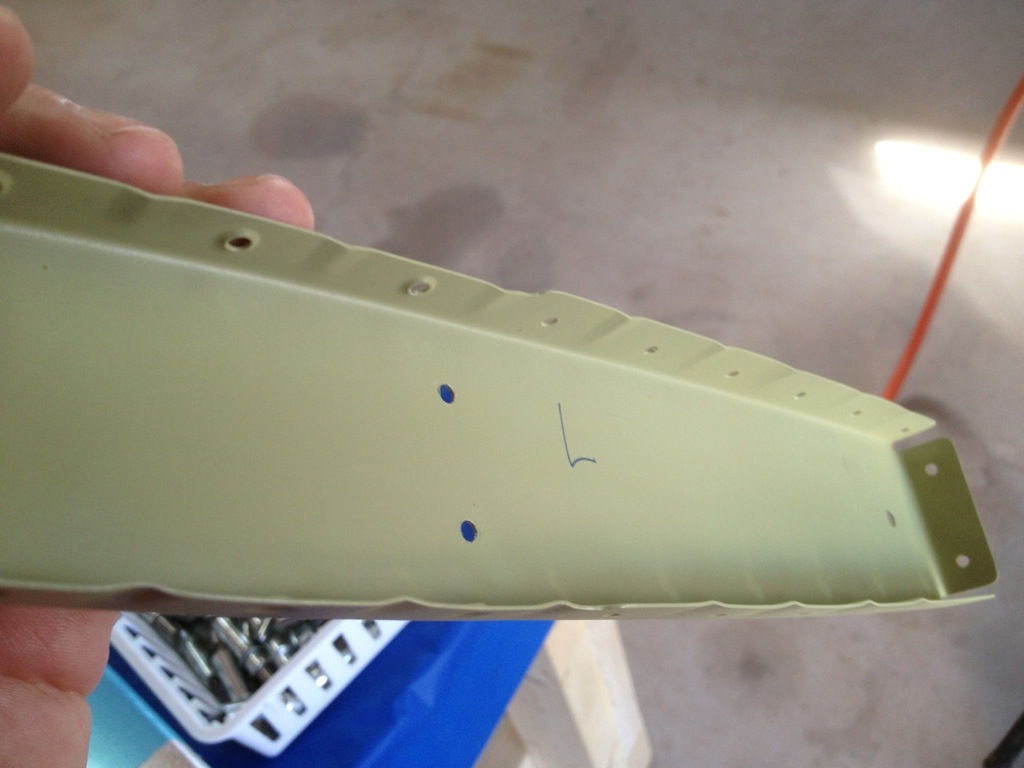
Hmmmm… this is strange.  Another part that evaded my eagle eye during the dimpling process.  Someone must have distracted me….

20130406-212234.jpg

Here are my first blind rivets that link the 708, 702 and 707 ribs and spar.  It was pretty easy.  Glad the second hand pop rivet tool I bought still has instructions on the inside of the handle.

20130406-212244.jpg

The yellow container is one of the rivet containers I mentioned above.

20130406-212257.jpg

I knew I’d make a mistake on a rivet somewhere and this is it.  Not sure what happened exactly, but I couldn’t ignore this one.  Time to check Hints for Homebuilders and drill this out.

20130406-212306.jpg

Here is the end result after successfully (never thought I’d be saying that) drilling out the bad rivet.  I had a few scratches that were a little deeper than I liked, so I had to do a little sanding / scotchbrite touch up.  The new rivet looks just fine on both sides.

20130406-212313.jpg

Here’s wehere I am at the end of the day.  I wanted to keep going, and finished all the rivets that required the gun and bucking bar, but I just didn’t have the energy.

20130406-212320.jpg


Horizontal Stab 5 (1.75 hrs)

I got a bunch of stuff done this weekend, and a tiny little bit done on the plane too.

First, tools! My shipment from Avery arrived… I now have everything I need to deburr, plus a back rivet set. I did a Lowes run and bought some miscellaneous items I needed. Many of my new tools had not been set up, so that was my main project for the day. I set up my cutting wheel, and bench grinder with the scotch-brite wheels.  I also added connections to many of my air tools, and ran some extension cords for lighting. My die set has some additional pieces, so I also drilled spots on the organizer block and labeled all the parts.

20130119-190013.jpg

The safety guard on the cutting wheel has got to go.  It makes it hard to see, and gets in the way.  I’ve got good safety glasses.

20130119-190024.jpg

The C-Frame I bought, does not have a spring mechanism, and I know this will be come a pain in the butt when it comes time to dimple, so I made a very quick redneck fix with an old spring, a washer and a zip tie.  I’ll have to think of a more permanent solution going forward.

20130119-190034.jpg

20130119-190046.jpg

I did my practice kit “homework” and deburred all the surfaces. I wanted to drill the skin and ribs, but noticed a slight length discrepancy between the skin and the spar. Figured I’d wait on Mike before I potentially mess it up any further. I’m already worried about the holes in the reinforcement spar being within an acceptable distance from the edge.

After deburring the practice kit, I measured the cuts required to the reinforcement bar.

20130119-185620.jpg

And made the cuts with my new cutting wheel.

20130119-211736.jpg

Getting the 6 degree angle was fairly easy since I had the old angle as a guide.

20130119-211748.jpg

Here’s the final product after deburring and cleaning up.  Lines up perfectly.

20130119-211759.jpg

As far as planning goes, once I get a little more practice with some of the other skills, the horizontal stabilizer will not be far from done.  I’ve decided to use AKZO as my priming system, and will have to put an order into Aircraft Spruce as soon as I have the funds.

It feels good to have done something other than buy tools, make plans, and set up the workshop.  While just a small item, I’m getting impatient and it feels good to finally move forward.