Okay. Seems like every post in the past year begins with an apology about the lack of keeping the log up to date. Today is no exception. This post will encompass the past two months or so that I’ve intermittently worked in the shop. While I haven’t been good about updates, I have been doing an OK job of taking photos. I’ve recently started work again on the plane, with my first project to tackle all things related to the empennage. First among these was the empennage intersection fairing.
As I’ve done the fastback modification to the fuselage, my empennage fairing supplied by Van’s isn’t going to come close to working. My approach was to cut the fairing into three sections, and then fiberglass the gaps.
Here is the fairing sitting on the attached tail feathers. You can see the cut – there is an identical cut on the opposite side.


I put packing tape on the airplane to make clean up a snap. (Be sure to use some tape of decent quality – use cheap stuff like I did, and – well you’ll see a bit later)

In addition to glassing the gaps created by the cut, I want to make sure I have minimum gaps and a nice tight fit. Here in the next few photos you can see some of the current gaps. I also want to use as few screws as possible for the attachment points.

My approach to glassing it was fairly simple. I secured the fairing with clecos, and then put two strips of fiberglass over top. A thick 3″ strip, and a thinner 2″ strip.


I used my trusty bag of lead shot to weight down the front portion as there are no clecos or holes in this section. The bag of lead shot does a better job anyways!

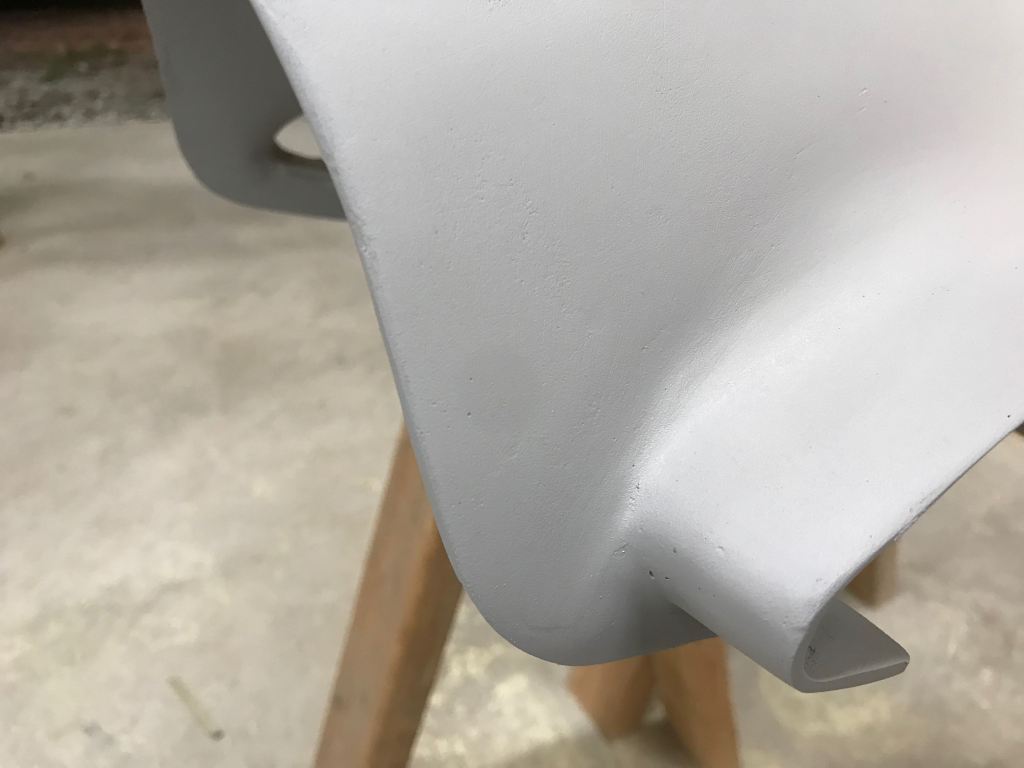
I also want my fairing to wrap around the front of the horizontal empennage just slightly. This is a pretty popular modification, and relatively simple. I can tell I am a bit out of practice, as my application of fiberglass here was a bit rushed and sloppy. I should have taken the time to split the front of the strips I was using, and have more careful measurements.

Next, I removed the fairing, and applied flox underneath the outer strips to fill the void. I then applied two strips of fiberglass to the inside of the fairing. Don’t overdo the flox, the idea is just to ensure there are no gaps between the inner and outer fiberglass. Now, here’s another mistake that you should avoid. DO NOT fold fiberglass over from one side to the next. I know better than to do this. I even thought to myself when I did it – “I shouldn’t probably do this – its going to give me air pockets and be a pain later.” But, again, being out of practice I’ve forgotten to listen to my sensible side and did it anyways. My sensible side was right – it was problematic later on. End of the world? Certainly not. But a mistake I should have avoided.

After it set up, I did some basic trimming and shaping. You can see its starting to really take shape.

Now its time to start filling in the gaps. Use flox and micro as appropriate. Micro for flat surfaces – flox for anything near an edge or requiring any strength. I used a small amount of micro to fill in the gaps between the fairing and the surfaces. This micro was only a very small amount and served as a distance guide for a subsequent application of flox, and then finally a layer of fiberglass. This made the fairing a little thicker at points, but the gaps are gone and I’m hopeful the extra thickness will help prevent the empennage for curling / bowing due to heat changes.

The rest of this story is primarily filling, and sanding. Repeat.