Peter


About Peter

plbarrett.com | Certified Flight Instructor (Single & Multi-Engine, Instrument, and Advanced Ground) | Commercial Helicopter

Fastback 4

The Show Planes Fastback includes new cockpit rails that are slightly smaller and attach in a different manner from the standard rails. With a quick build this means that I need to remove the currently installed rails. First I removed the bolts holding the center bar in place.  

Then I began drilling out each of the rivets carefully using my rivet removal tool. I used a #40 (or #30) punch to break the head off each rivet and then a spring loaded center punch to pop the remainder of the rivet out of the longeron. Its preferable to not drill through the longeron… this is a structure you don’t want mistakes in.

Sometimes pop rivets can be a pain in the rear to remove. I find that if you drill completely through with a slightly smaller drill and then pop the heads of in the same manner, its easy to punch the remainder through. I use a number 38 drill.   

Here is the fuselage with both rails removed.

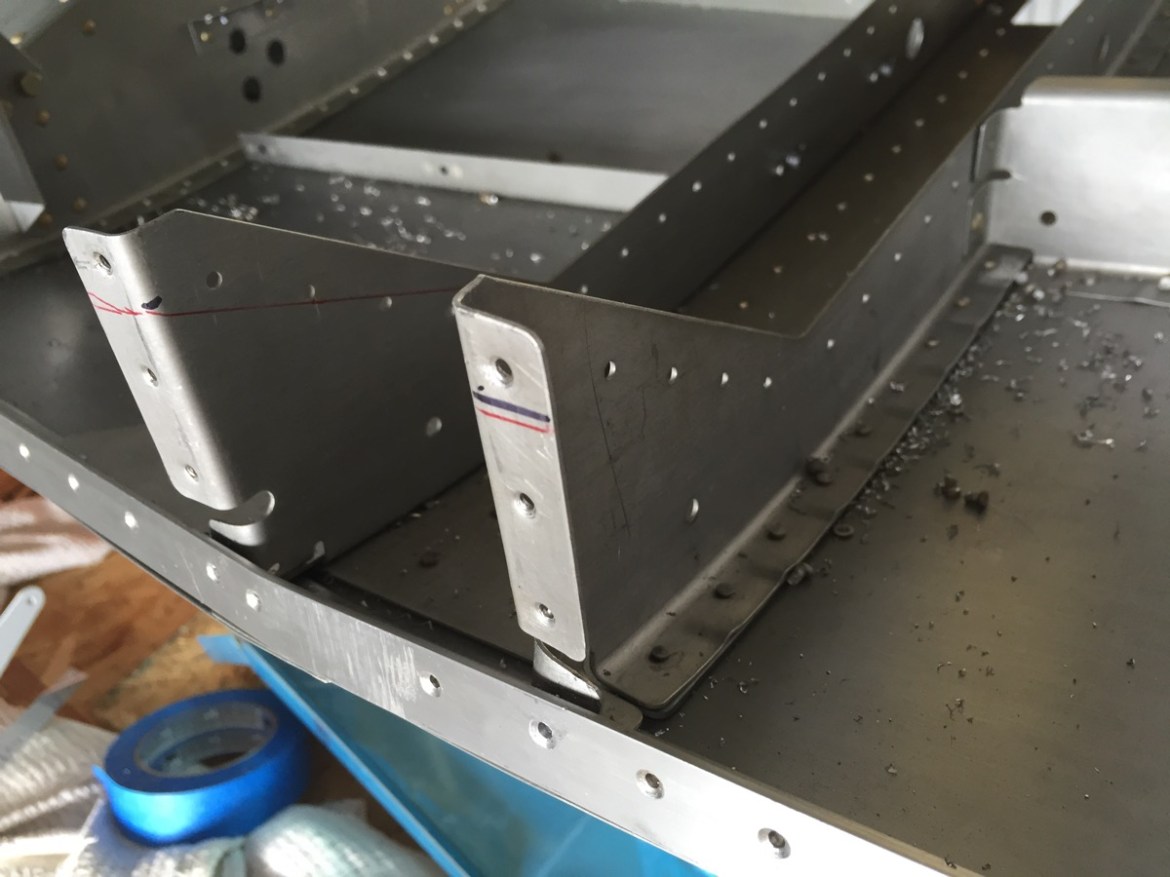
Next you need to trim the two F-804c bulkheads down to accommodate the thinner rails. The cut line is marked in red. This is going to result in a few areas close to existing holes. There is a center cap that goes over this area, so I’ll have to modify that, and test alignment to see how to best deal with any edge distance problems after the trim. In the Show Planes manual, the bulkheads do not show any holes, so I’m assuming this was added to the updated -1 fuselage.   
Here you can see the photo without any holes in the Show Planes instructions. Also, there appears to be an additional part on top, that is not present in my kit.   

Here is the cap that will need to be modified to fit the newly trimmed area.

After the cut.  

Unlike the stock rails, the new rails fit between the longeron and the outer skin at the front. A few cleco clamps and attention to detail are required before you start this drilling.  The photo is supposed to say longeron not lingering. Autocorrect!


Fastback 3

Not too much accomplished today. I removed the upper aft fastback portion of the fuselage in preparation for deburring, dimpling, and priming.  

There is a slight ripple visible in the aft skin. You can see it in the shadow line near the middle of the photo below. Its very obvious when the skin is laid flat, but when you curl the skin it is almost nonexistent. I’m not worried about it, but I’m curious as to how it got there. Somewhere in the installation process, as I don’t believe it was this way when it arrived.


Fastback 2

The first step in the instructions calls for the modification of the vertical stab to accommodate the aft fuselage top skin angle, however I’m going to return to this step later. I like the Show Planes instructions, but after today a few things to keep in mind. The bulkheads are not pre-drilled. You need to carefully mark rivet locations, flute, mark the center line and meticulously drill. Don’t go fast or you could wind up with a mess. Additionally, the rotating fuselage stand was an absolute blessing today. I used it in multiple positions to complete the work.

Today’s first task was to assemble the bulkhead immediately aft of the rear passenger. The first thing I immediately noticed with the kit is that the pre-punched holes are just slightly smaller than Van’s and clecos can be hard to set. The smaller F807s fit underneath the larger F807 angle to accommodate the raised center section overlap for the two halves.

After this was match drilled, I needed to bend the portion of the bulkhead below the longeron cut out to 17 degrees. I don’t need to be too precise with this, as the skin will help to align the part later. I used Mike’s digital level to approximate 17 degrees.
The instructions also call for removing the corner of the bulkhead at 63 degrees to accommodate the upper longeron. However, this has already been completed on the bulkhead’s provided. Additionally, the instructions call for the shoulder harness cutouts to be made in the bulkhead itself, but the ones provided have this completed already as well. Clearly, Show Planes have made some updates to the kit, but the instructions still need updating. No bother, I like finding out that work has already been completed. Next I secured all of the bulkheads in place by clecoing them to the fuselage.


I temporarily installed the skins so that I could mark the approximate rivet locations on each of the bulkheads as these are not predrilled.   In addition to marking the rivet locations, I drew a centerline on each of the bulkheads to assist with lining up the skins. Then I fluted and straightened each bulkhead as appropriate.

I reattached the skin by clecoing both sides to the upper longerons. Then I had to ensure alignment with the skin. This wasn’t as easy as I hoped. I had to constantly pull and push the bulkheads to get the alignment I was looking for. To do this, I used either a long bit of pipe I had laying around, or I the strap with the hook for the inner two bulkheads. Slow and diligent progress achieved excellent results. Here are some pictures of the final work: