My order from Avery Tools was waiting for me when I got home from work this evening. Inside were two new deburring bits and a 2″ scotchbrite wheel. I’m glad the bits came, as they made this evening go a lot quicker. I finished deburring all of the holes on the wing skeleton and began dimpling the ribs and rear spar.
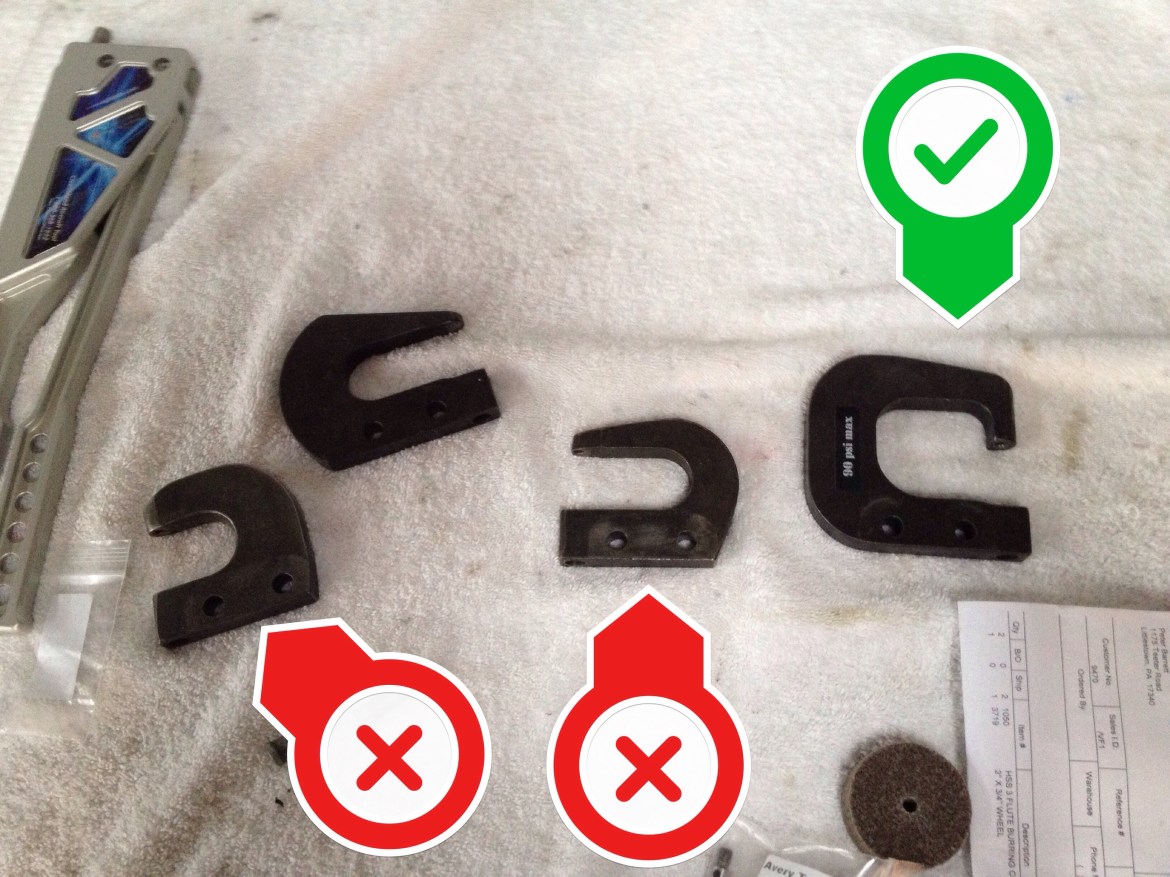
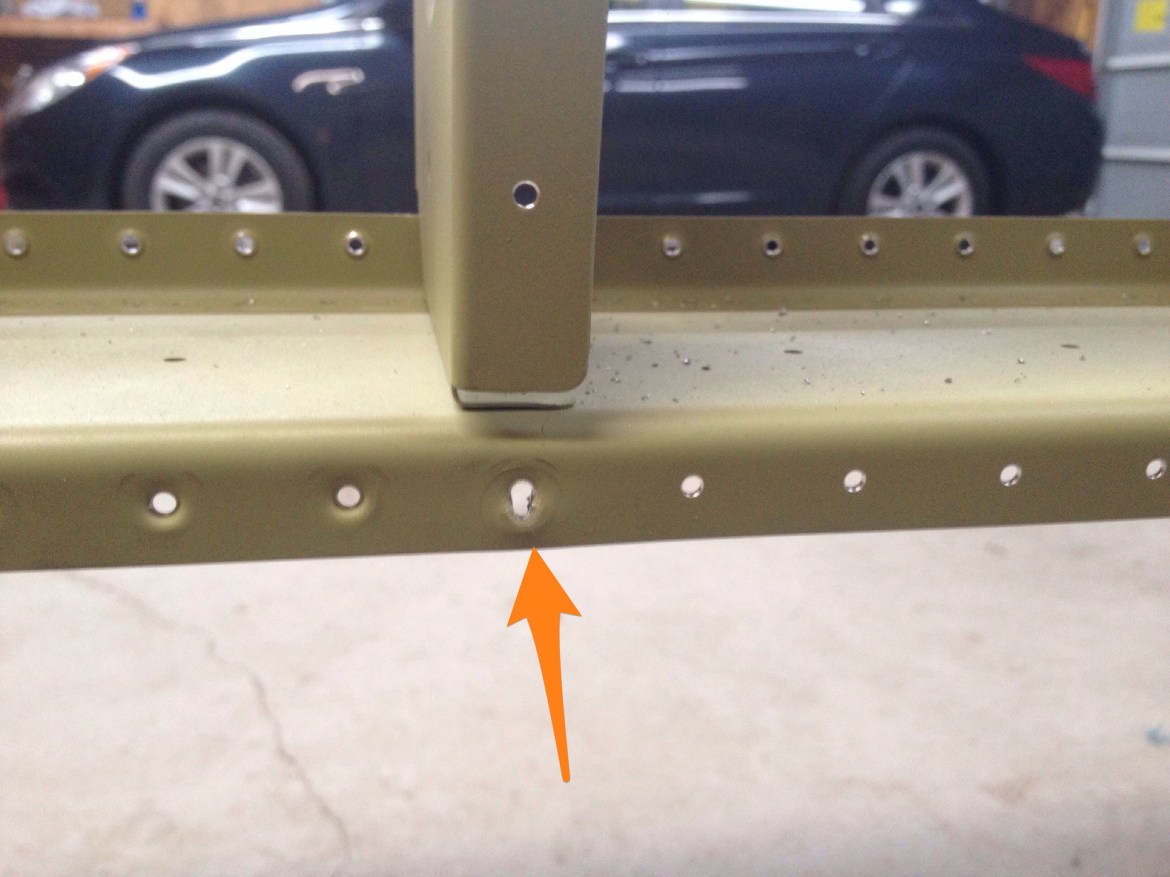
This is where I first ran into trouble. I noticed that two of my yokes were not allowing the dimple dies to lay flat against one another. They were squeezing slightly off center, and I didn’t like the resulting dimples. Here is a picture of a few of my yokes. The offending yokes are marked in red and my favorite yoke in green. I’m going to have to give some thought as to how to correct this. It might simply mean it is time to buy a couple more yokes, which I hate to do, as they are not cheap.  I started to experiment with different yokes and in the process made a mistake. I used a large yoke that was unwieldy buy yielding better dimples. I caught a rivet as I removed the pneumatic squeezer and enlarge one of the dimple holes. Well, that is now the second time I’ve made that mistake in the building of this airplane. Normally I don’t dimple with the pneumatic squeezer for this very reason. But I did, and here we are. I’m not too concerned. Here’s the offending hole. Normally this would piss me off to no end, but I’m surprisingly not bothered by it.
I decided to drill the hole out to 1/8″ and use an oops rivet in this location. Additionally I cleaned the edges with a file to ensure no burs and no cracks. I re-dimpled and made a small brace to put behind the hole. Here is the result. **UPDATE 2014.11.23** I completed this repair when installing the aileron gap fairing in Wings 35. 
Here you can see the location of the mistake in relation to the rest of the wing.  Final thought for the evening. I emailed Van’s Support about this, but I think my solution is sound. **UPDATE** Van’s responded to my email that my solution was sound and to build on!
