Yearly Archives: 2014


Wings 18 (5.0 hrs)

Today I finished all of the dimpling and countersinking of the wing skeleton (ribs and spars). Not a particularly fun job.

Van’s instructs to use a deburring  bit to clean out the dimples on the rear spar slightly to ensure a better fit.  You can see the result in this first picture where I’ve done three turns of the deburring bit in the dimpled holes.20140329-220502.jpg

A good picture of the countersinking of the spar in progress. 20140329-220520.jpg

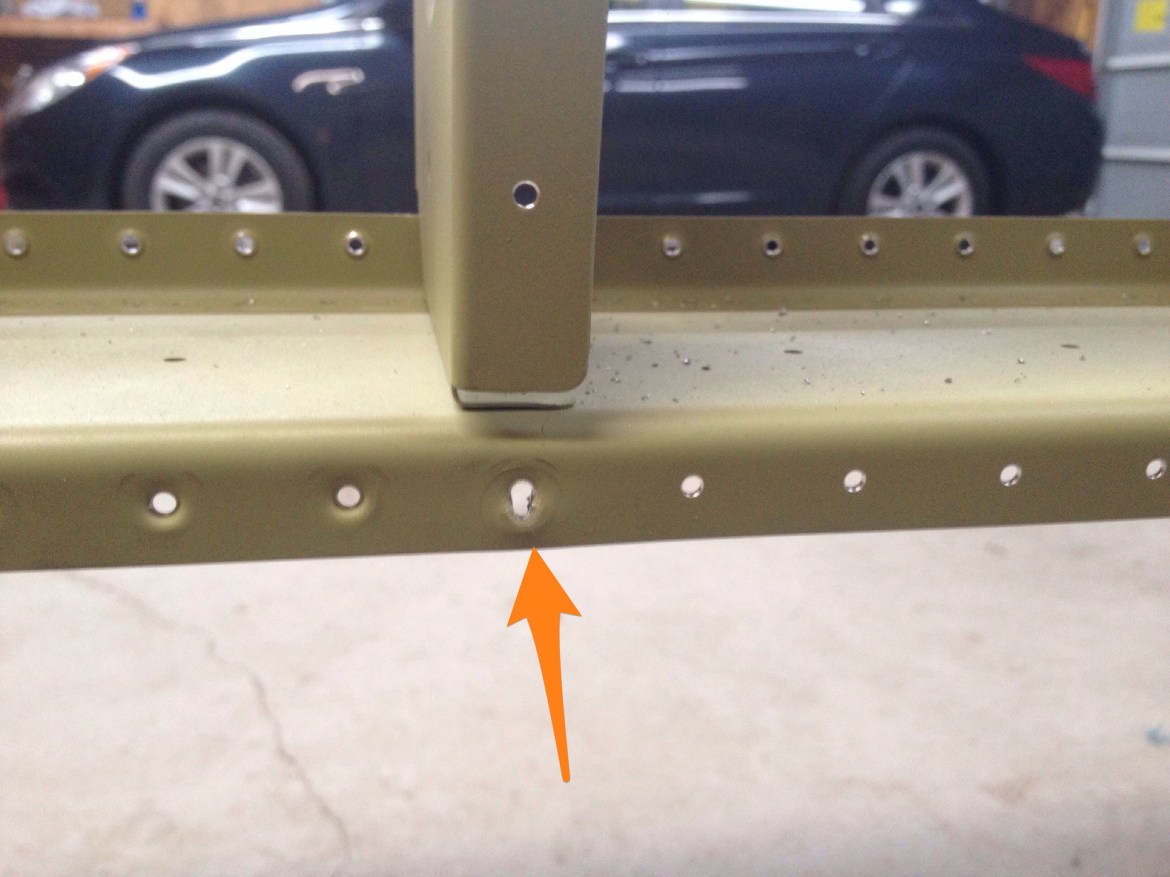
It took me awhile to figure out what to do here because these rivet holes are not annotated on any diagram nor are they mentioned in any of Van’s instructions.  I suppose you could leave out the rivets and be ok, but I will put the rivets in before attaching the skins. 20140329-220532.jpg

The location of the “missing” rivets is the forward most rivet for each inboard rib where the fuel tank attached.  I have high lighted those locations below. 20140329-220541.jpg

Here is a quick snapshot of the completed wings after dimpling.  Not much to see. 20140329-220552.jpg

In the process, I came across one countersink for the fuel attachment nutplates that I didn’t prime.  How I missed that for several months is beyond me.  It will only take about 3 seconds to fix, but I was amazed that I’ve walked by it so many times and not noticed until now.  It also gave me another opportunity to play with some more of the features of the app I’m using on my iphone to draw arrows etc.  The app is called Skitch. 20140329-220600.jpg


Wings 17 (2.5 hrs)

My order from Avery Tools was waiting for me when I got home from work this evening.  Inside were two new deburring bits and a 2″ scotchbrite wheel.  I’m glad the bits came, as they made this evening go a lot quicker.  I finished deburring all of the holes on the wing skeleton and began dimpling the ribs and rear spar.

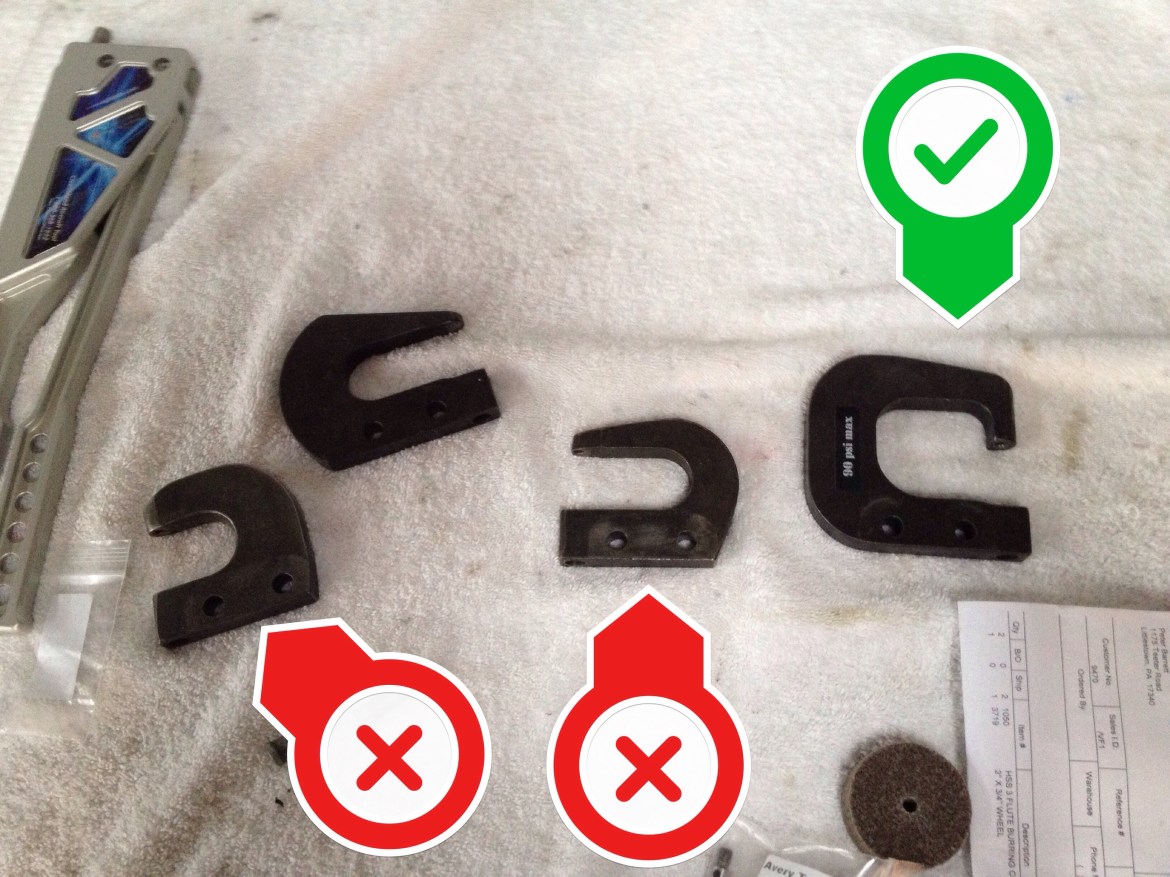
This is where I first ran into trouble. I noticed that two of my yokes were not allowing the dimple dies to lay flat against one another.  They were squeezing slightly off center, and I didn’t like the resulting dimples.  Here is a picture of a few of my yokes.  The offending yokes are marked in red and my favorite yoke in green. I’m going to have to give some thought as to how to correct this.  It might simply mean it is time to buy a couple more yokes, which I hate to do, as they are not cheap. 20140328-201707.jpgI started to experiment with different yokes and in the process made a mistake.  I used a large yoke that was unwieldy buy yielding better dimples.  I caught a rivet as I removed the pneumatic squeezer and enlarge one of the dimple holes.  Well, that is now the second time I’ve made that mistake in the building of this airplane.  Normally I don’t dimple with the pneumatic squeezer for this very reason.  But I did, and here we are. I’m not too concerned.  Here’s the offending hole.  Normally this would piss me off to no end, but I’m surprisingly not bothered by it. 20140328-201627.jpg

I decided to drill the hole out to 1/8″ and use an oops rivet in this location.  Additionally I cleaned the edges with a file to ensure no burs and no cracks.  I re-dimpled and made a small brace to put behind the hole. Here is the result. **UPDATE 2014.11.23** I completed this repair when installing the aileron gap fairing in Wings 35. 20140328-201645.jpg

Final product.20140328-204248.jpg

Here you can see the location of the mistake in relation to the rest of the wing. 20140328-204229.jpgFinal thought for the evening.  I emailed Van’s Support about this, but I think my solution is sound.  **UPDATE** Van’s responded to my email that my solution was sound and to build on!


Wings 16 (6.0 hrs)

Again, I’ve done a poor job of updating in a timely manner.  This post encompasses a couple of sessions from last weekend.  During this time I have continued to prepare all of the wing skins for priming and riveting to the main skeleton.

I began by completing the deburring of the leading edge skins and ribs.  I also prepared all the surfaces for priming with scotchbrite pads.  When I scuff the skins, I use the grey scotchbrite pads, which are less abrasive than the maroon ones, and I use a very light and quick touch.  The idea is to scuff, but not penetrate, the alclad. Leaving the alclad in place should increase corrosion protection. 20140327-162309.jpg20140327-162320.jpg

Next up I set about removing the blue vinyl from all eight skins.  I completely removed the vinyl from the interior surfaces that will be primed and using the soldering iron I removed the areas around the rivet holes on the exterior skins. 20140327-162352.jpg

In the process, I’m trying to increase my use of checksheets.  As such, I put the following list of to-do items on each wing skin, so I can be sure not to forget something like deburring the edges. 20140327-162336.jpg

20140327-162411.jpg

20140327-162447.jpg

With all of the skins removed the wing skeleton looks naked!20140327-162503.jpg

Finally, I began deburring the wing ribs. I deburred the outsides of all the ribs.  I’m going to wait before I debur the insides.  I lost my good deburring bit, and the countersink I’m using doesn’t work well if you are at an odd angle… and its a little bit slower.

I ordered a new countersink bit (2 actually) and I also put in an order to Aircraft Spruce for the Gertz Pitot tube bracket.  I’m still considering whether or not I should install the landing light mounting brackets in the leading edge now or wait until I have the lights in hand and retrofit the leading edges.  I made a post on Rivetbangers… so we’ll see what the guys think.  I’ll post the thread here in a later post.  Cheers -PLB