Painting and Detailing


Paint Shop – Completed

A few final projects to complete inside my ugly, but functional paint booth. First I needed to assemble and hang the fluorescent lights. You can see from the photos below that it is pretty dark in there right now. 

These lights were the cheapest mounts for T-8 bulbs I could find. Super simple, but effective. I mounted them with some wire and 14mm staples from a staple gun. Trust me, they’re going nowhere.
  

Here is the end product, all wired up and lit up. This picture doesn’t really do it justice, as its very bright inside now!  


Paint Booth

I continued work on the paint booth over the weekend. The first layer of plastic is super thin, and I should have known, not sufficient to withstand the negative pressure (it was cheap!). Regardless it serves a good purpose to create a semi-clean workspace in a barn, that is anything but!  

My first order of business was to install the furnace filter intakes, and the fans facing outward.

Next I began installing the thicker 4mil plastic. I completed both of the walls and most of the ceiling. Then I used 3.5 mil plastic for the two end walls.

The thicker plastic is only 10 feet wide, so I have a small strip on the ceiling at this point that will require some additional plastic.  

I used furring strips to hold the plastic to the wall with 1/2 inch staples.
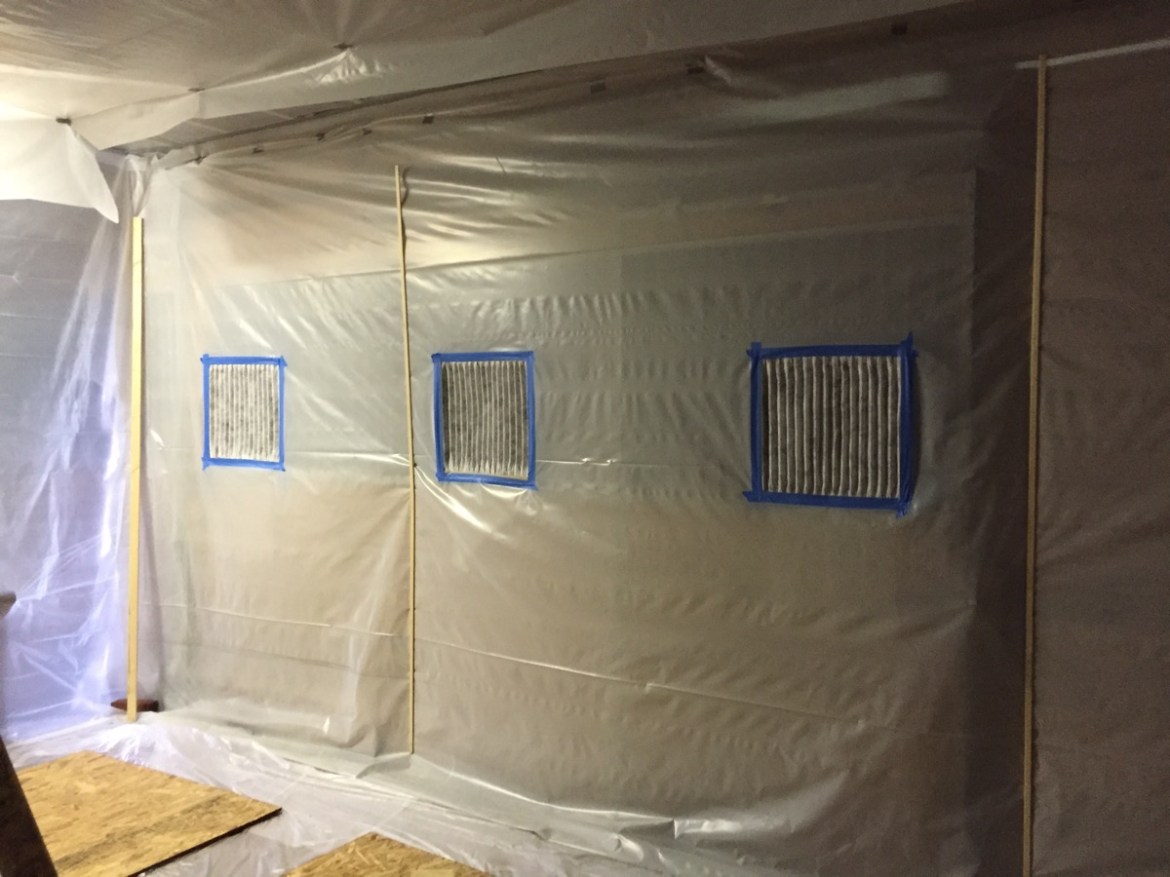
  

In the next shop session, I finished the ceiling segment and installed another layer of the 0.31 mil plastic underneath the “floor” boards shown here. I then taped the floor seems with duct tape. Show in this photo is the condition of the booth with both fans on. The negative pressure is rather intense, but everything is holding up just fine.

Another photo of the negative pressure effects.   

As you can see the floor billows out a little but the spare wood holds it in place. Bricks hold down the walls, and I still have a few furring tips to install. I also have some 1x1s to install in the corners. After that a little more duct tape sealing and some stapling and the sealing work will be essentially complete.
  

This photo is the entrance. The entire wall is a sliding barn door. Since this will be the entrance point, I can’t use a furring strip. The heavy duty rubber mats I have act as a good seal for the bottom. To close the door on the right and left I will use duct tape and possibly a board that I can screw and unscrew for opening the door.

I still need to hang the four lights, and then complete the sealing work and this puppy will be ready for action.


Making a home paint booth

Since I began this project I intended to paint the entire aircraft myself. I’m confident with all the experts around that I can do it successfully. To that end, I began setting up a paint shop in my father’s barn. Yes, I won’t be painting the airplane for quite some time. Perhaps another few years, but in the mean time I have lots of parts to prime, and the interior will need painting. Painting at the airport isn’t feasible, and painting at my uncle’s or at friends is only ok on rare occasions. This paint booth will be of sufficient size and quality for the final paint job.

The barn is full of dust, and a mess currently. Here’s the before shot. My dad is retired and no longer uses the barn for anything other than storage. We decided to use the center aisle. This gives me a space of 10′ high, by 12′ wide, and 25′ long. More than enough for the plane.   The first step after a basic cleanup was to affix the plastic to the ceiling. Quick work with the staple gun. Then the walls. And finally the floor! There is still a lot to do. The exhaust fan is only up temporarily, and I’ll need to duct that to the outside and seal it up. I have a few furnace filters that will be used for the air inlet, which also hasn’t been added. I plan to use the spare particle board laying in the hangar for some basic flooring which will help hold the plastic in place. Also the seems will need to be taped closed, and I plan to use some wood strips to hold the plastic in place in the more difficult spots. And finally, I will need to add some better lighting. I suspect critters and time will cause some damage to my shop, but plastic is cheap, and I have a ton left over. Repairs will be cheap and easy. Now I might have a year or two (or three) before final painting, but this is going to make priming a breeze.